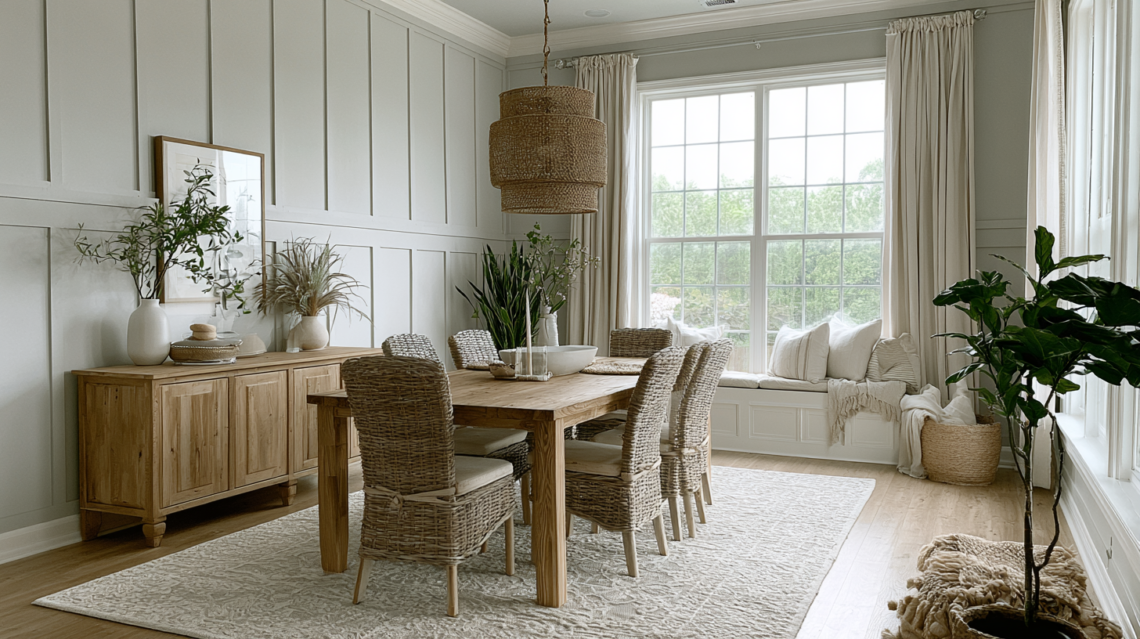
The first time I saw board and batten in real life, I was in a beautiful home in the historic part of town. The walls had this architectural detail that made the whole room feel elevated, intentional, expensive. I realized that by adding a Board and Batten wall, you can transform your home with style!
“That’s beautiful,” I said to the realtor, already mentally assigning it a price tag I could never afford.
Then she said, “The homeowners added that last year themselves.”
I didn’t believe her at first. But she was right. Board and batten – those vertical panels you see in farmhouses, cottages, and suddenly everywhere on Instagram – is one of the most forgiving DIY trim projects you can tackle. And unlike some accent walls, board and batten can add architectural character without relying on a bold color or pattern.
Here’s how to do it. A complete step-by-step guide with all the tips, tricks, and honest talk about what makes this project work
What Even Is Board and Batten?
In interior design, board and batten is commonly used to describe a wall treatment made with a combination of horizontal rails and vertical battens to create a series of panels. The horizontal board runs across the wall at a chosen height – usually about one-third to one-half the way up. Vertical strips run along the wall, creating clean vertical lines. It’s both decorative and architectural, and it gives a room instant character.
The look is versatile. Depending on the proportions, materials, and paint color, board and batten can work with farmhouse, coastal, traditional, transitional, and even more contemporary interiors.
The best part? You don’t need a contractor. You don’t need years of experience. You need a level, some patience, and a willingness to let small imperfections disappear under paint.
Before You Start: Tools and Materials
Get these together before you pick up a saw. Trust me on this.
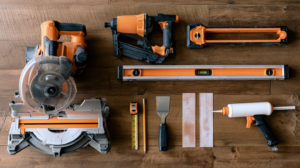
Tools
- Miter saw or circular saw – to cut your boards and battens straight and square. A miter saw is easier if you have one; a circular saw works just fine if you don’t.
- Brad Nailer or finish Nailer – this is the tool that changes everything. A brad nailer (powered pneumatic or battery) drives thin nails without splintering the wood or requiring you to pre-drill every single hole. If you don’t have one, you can use a regular hammer and finish nails, but it’s slower and riskier. Budget ~$50–$100 to buy or borrow one.
- Level – a 2–3 ft level is essential. You’ll use it on every single board.
- Stud finder – optional, but useful. Studs are where your boards will hold strongest.
- Tape measure and pencil
- Putty knife – for applying wood filler
- Sandpaper – 120-grit and 150-grit to smooth everything before painting
- Caulk gun – for caulk along seams (optional but recommended)
Materials
- MDF boards for the horizontal rail – a 1×4 or 1×6 (depending on your design), in primed MDF. Primed MDF is a popular choice for interior board-and-batten projects because it has a smooth surface, cuts cleanly, and is relatively affordable. For bathrooms or other areas with significant moisture, choose a material specifically suited to the environment.
- MDF strips for the vertical battens – typically 1×2 or 1×3 strips, also primed MDF.
- Brad nails or finish nails – Choose nail length based on the thickness of your trim and wall surface so the fastener provides adequate hold without penetrating where it shouldn’t. For many interior trim projects, 1½- to 2-inch brad or finish nails are a common starting point.
- Wood filler – to fill nail holes. Use a quality filler that doesn’t shrink (DAP DryDex is reliable).
- Primer and paint – use a paint + primer combo for the best coverage. Two coats is typical.
- Caulk -Paintable acrylic latex or siliconized acrylic caulk for seams.
Optional but Really Nice to Have
- Nail set – a small tool that lets you drive nail heads slightly below the surface for cleaner filling
- Miter saw stand or table – makes cutting faster and more accurate
- Pneumatic compressor – if using a pneumatic brad Nailer (battery-powered is easier for one-person projects)
Step 1: Plan Your Layout (Don’t Skip This)
This is where the whole project lives or dies. Take your time here.
Decide your wall height. Most board and batten installations cover the bottom third to half of the wall. A good starting point is between 30–48 inches from the floor, depending on your ceiling height and the look you want. Measure up from the floor and lightly mark this height with a pencil at several points across the wall.
Snap a chalk line. Use a chalk line to mark the exact height where your horizontal rail will sit. This line is your reference – everything else lines up to it.
Decide on batten spacing. Spacing is a design choice and often falls somewhere around 12–16 inches, although wider or narrower spacing can work depending on the wall size, batten width, and desired look. For example, if your wall is 120 inches wide, sketch your battens and calculate the actual spacing after accounting for the width of the battens and the desired edge margins. Measure across your wall width and figure out spacing that divides evenly (or nearly evenly) from one corner to the other. Sketch this on paper first.
Mark your studs. Use a stud finder or the knock test to locate studs behind the wall. Mark them lightly with a pencil. You’ll nail your boards into these studs whenever possible – they’re what hold everything securely.
Take a step back. Look at your pencil marks from across the room. Does the spacing look right? Does the height feel balanced? Make adjustments now, before you cut a single board. This is the easiest edit you’ll make.

Step 2: Cut and Install the Horizontal Rail
The rail is your anchor. Get this level and straight, and everything else is easy.
Measure, cut, and dry-fit. Measure the length of your wall, cut your 1×4 or 1×6 board to length. Measure the wall carefully and dry-fit the rail before fastening it. If the wall isn’t perfectly square, make small adjustments to the cut rather than automatically subtracting a fixed amount.
Install the rail. Using your brad Nailer, drive nails through the rail into the studs you marked. Space nails about 16 inches apart, right into the stud locations. Use a level constantly – check horizontally and also check that it’s sitting flat against the wall (no gaps behind it). If there are gaps, shim the rail with thin shims until it’s flush.
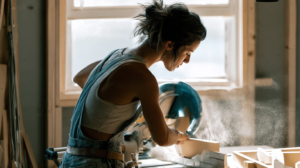
Follow the Nailer’s recommended technique and drive fasteners flush with the surface rather than overdriving them.
Step 3: Install the Vertical Battens
This is where the project gets visual. Battens run from the baseboard to the horizontal rail (or higher, depending on your design).
Cut your battens to length. Measure from your baseboard to the bottom of the rail. Add about 1/4 inch for fit, then cut all your battens to this length (they should all be the same height if your floor is level – spoiler: it probably isn’t, so cut a few test pieces first and adjust).
Mark your batten locations. Using your pencil marks on the wall, mark where each batten will go – typically a small X or line at the center of where the batten will sit.
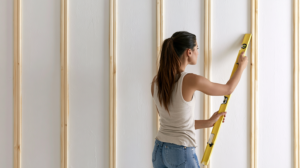
Install the first batten. Line up your first batten at the stud location (if possible) and use a level to make sure it’s perfectly vertical. This is critical – one crooked batten throws off the whole look. Once it’s level, drive brad nails through the batten into the stud, spacing them about 8–12 inches apart. Use a nail set to drive the nail heads just below the surface (about 1/8 inch) – this makes filling easier and cleaner.
Install the remaining battens. Repeat for each batten location. Use a level on every single one. This is tedious, but it’s the thing that makes the final product look professional.
Step 4: The Most Important Step – Fill Every Nail Hole
This is where most people rush, and it shows.
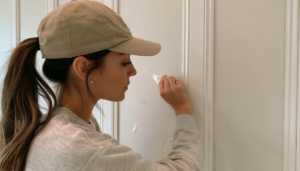
Apply wood filler. Use a putty knife to press wood filler into every nail hole.
Let it dry completely. Follow the filler manufacturer’s drying time (usually 2–3 hours for fast-set fillers). Slightly overfill the hole if the product instructions recommend it, then sand the surface flush once completely dry.
Sand smooth. Use 120-grit sandpaper to sand all the filled holes flush with the surface. Then use 150-grit sandpaper to smooth everything. You’re aiming for a surface that’s totally smooth – no bumps, no valleys, just flat wood.
Caulk the seams (optional but recommended). Run paintable caulk along where the battens meet the rail and where the rail meets the wall. This creates a clean line and hides any tiny gaps. Tool the caulk smooth according to the product instructions and allow it to cure completely before painting.
Step 5: Prime and Paint
Your boards are now ready for color.
Prime everything. Prime any raw MDF, exposed edges, and filled areas with an appropriate primer. Once cured, apply your chosen interior paint according to the manufacturer’s instructions.
Paint. Use a paint + primer combo in your chosen color. Apply two coats, sanding lightly between coats with 220-grit sandpaper. For a smooth, professional finish, use a foam roller or angled brush – avoid a thick nap roller which can leave texture. Apply two to three coats, allowing the paint to dry completely between coats.
Paint the wall behind the rail (optional). If you want the wall above the rail to be a different color, paint it now. Crisp, clean edges are everything here – use painter’s tape along the top of the rail to keep lines sharp.
Design Ideas: How to Style Board and Batten
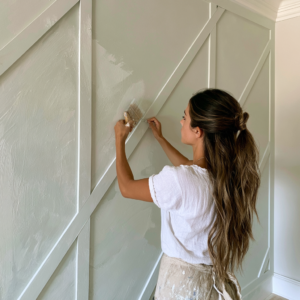
The beauty of this project is flexibility. Here are the looks people actually choose:
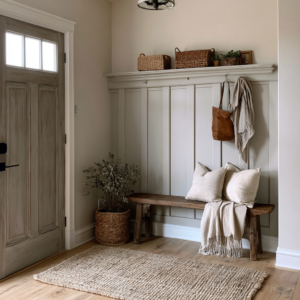
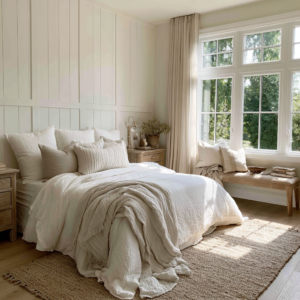
All white, classic. Paint everything – wall, rail, battens – the same crisp white. This is the timeless farmhouse look. It’s simple, it works, and you can’t go wrong.
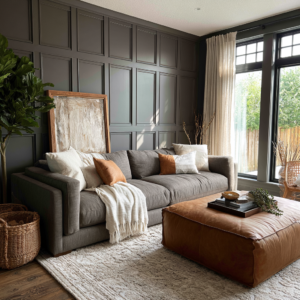
Paint the wall, white trim. Paint the wall behind the rail a bold color (navy, sage green, soft gray) and leave the rail and battens crisp white. This is the look that gets pinned constantly, and it’s just as easy as all-white.
Wood finish instead of paint. For a warmer natural look, use real wood boards and battens rather than MDF, then stain or clear-coat them according to the wood species and manufacturer’s recommendations. MDF does not behave like natural wood when stained, so it is generally better suited to painted finishes.
Natural wood + matching wall. Stain the board and batten to match your wall color. Creates a cohesive, subtle look that adds texture without bold color contrast.
Estimated Project Cost
For a roughly 10-foot-wide accent wall, material costs can vary considerably based on the trim material, paint, tools you already own, and local prices. Use the following as a rough planning estimate rather than a fixed project price.
Time:
- Planning and measuring: 1 hour
- Cutting and installing boards: 3–5 hours (depending on wall size and whether studs cooperate)
- Filling, sanding, caulking: 2–3 hours
- Priming and painting: 4–6 hours (including drying time between coats)
- Total: 10–15 hours spread over several days (because of drying times)
Cost (for a standard accent wall, roughly 10 ft wide × 4 ft tall):
| Item | Cost |
|---|---|
| MDF boards and battens (1×4 rail + 1×2 battens) | ~$40–$60 |
| Brad Nailer (if you don’t have one) | ~$50–$100 |
| Brad nails | ~$5 |
| Wood filler | ~$8 |
| Sandpaper | ~$10 |
| Primer and paint (2 quarts) | ~$30–$50 |
| Caulk | ~$5 |
| Total | ~$150–$230 |
This assumes you already have basic tools (level, tape measure, saw). Doing the work yourself can reduce labor costs substantially, although your final savings depend on the wall size, materials, and tools you already own.
Mistakes I Made (So You Learn Faster)
Not checking for studs. Where practical, identify studs before installation so you can fasten the rail securely.
Rushing the filling and sanding. The most common mistake. Every unfilled nail hole becomes a tiny shadow once the paint is on. Every rough spot shows. Fill everything. Sand everything. Then paint.
Painting before sanding. Primer and paint don’t stick well to dust. Vacuum, then wipe the whole surface with a damp cloth before priming. You’ll see the difference immediately.
Spacing battens unevenly. “Close enough” spacing looks amateur. Measure, mark, then measure again. Consistency is what makes this look professional.
Skipping a level check. One batten out of plumb and your eye catches it every time. Level everything, every time.
The Final Moment
When you step back and see the whole wall finished – primed, painted, ready for your room – that’s the moment it hits you: you built this. Not a contractor. Not a designer. You.
Board and batten is the kind of project where the effort is visible in the final product. People see it and they immediately assume you had someone come in. When you tell them you did it yourself, they get that look – part impressed, part motivated.
You earned that look.